Sunday, 17 April 2011

Have your cake and eat it too

I've had a pretty busy past couple of weeks. Between midsemesters, 21st birthdays and work I haven't had a hell of a lot of spare time to cook. I also had the veterinary science ball last fortnight, and whilst it was a pretty awesome night, there was one little thing that bugged me. The vegan food. 

Now don't get me wrong, I'm not a vegan. I love cheese and chocolate and yoghurt and ice cream and poached eggs and so on way too much. However, I think being a vegan is a pretty selfless thing to do, and it annoys me how some restaurants don't put any effort or thought into their vegan dishes. At the ball, the vegans got fruit for dessert. Fruit is pretty tasty, but when I go out for a nice meal I expect something that takes a little more preparation than simply cutting and serving.

Anyway, last week also happened to be a friend's (who also happens to be vegan & gluten intolerant) birthday. So of course I had to make something.


Chocolate cakes with vanilla glaze. Gluten free and vegan. And pretty darn easy to make.

Now, I'm not going to lie - these were neither the tastiest, nor the prettiest thing I've ever baked. But they were certainly a bit nicer than plain old fruit. They actually kind of reminded me of the devil's food cake doughnuts you can get from Krispy Kreme.


Here's all the ingredients you need (+ balsamic vinegar)


Place the cocoa powder and coffee in a bowl (don't exclude the coffee, even if you don't like it. You can barely taste it, and it helps keep the cakes moist)


Dissolve in a cup of boiling water. Let it cool while you get the dry ingredients.


Mix together your gluten free flour, brown sugar, baking powder and baking soda. Make a well in the middle.


And mix in the cocoa & coffee. Once the mixture is smooth and there are no lumps, add in the vinegar and mix together. 


Fill each of the patty pans with the mixture, so that they're about 3/4 full - about 2 tbsps mixture in each. Then just let them sit for about 1/2 an hour. You should probably clean up after yourself. Or you could make some pretty things to top your cakes like I did.


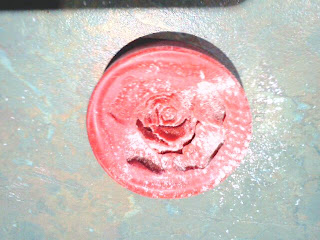
I used these nifty silicone moulds and a bit of tinted fondant.


Just dust with a bit of gluten free flour, and pop a little bit of your tinted fondant in. You can make the flowers as big or small as you like (I usually use corn flour, but in this instance I thought I better keep everything as gluten free as possible).


Then just bend the mould to pop the flower out.


You should probs cook your cakes at some point too. They came out a little flat, might have to experiment a bit more...


Once you top them with a little glaze and a pretty flower you can barely notice.

Gluten-free, vegan friendly chocolate cupcakes
Makes 12


1/4 cup cocoa powder
1 tsp instant coffee grinds
1 cup boiling water

1 3/4 cups gluten free flour
1 tsp baking powder
1 tsp baking soda
1 tsp balsamic vinegar

For the glaze
2 cups pure icing sugar
1/4 tsp vanilla essence
water

  1. In a bowl stir together the cocoa powder, coffee and boiling water. Allow to sit for a few minutes
  2. Sift together flour, baking powder and baking soda. Make a well in the middle and pour in the cocoa & coffee mixture. Mix till well combined. Mix in the balsamic vinegar
  3. Divide mixture into a lined 12-hole patty pan, filling each to about 3/4 full. Allow to sit for about 1/2 an hour
  4. Preheat your oven to 160 degrees celsius (fan-forced). Bake for about 20 minutes, then cool on a wire rack.
  5. To prepare your glaze, combine the icing sugar (make sure it's icing SUGAR not icing MIXTURE. Icing mixture usually contains other ingredients which aren't necessarily gluten free) and vanilla extract with enough water to make a thick icing. Spoon/drizzle onto the top of each cake. Top with a decorative flower.


Tuesday, 5 April 2011

Super easy pudding


This could be really dangerous to diets. A simple, single serve mocha pudding that takes 5 minutes to make. 

Sometimes I just really want something warm and comforting dessert wise, but making up a whole 4 serve dessert recipe is a bit of a waste when you're the only one who wants some. 


To start with, all you'll need is 25g of butter. Chuck it in a microwave safe bowl or mug (NB: this cute little blue ramekin may look nice, but the sides were a bit low and I had a bit of overflow. A mug might be better)


Microwave on high till your butter is melted


Next we add 1/4 cup flour


plus a tbsp of cocoa and 2 tbsp of sugar


And 1 1/2 tbsps (=6tsps) of milk, and a dash of vanilla essence


Mix it all together to form a lovely chocolatey goop


Sprinkle on 2 tbsps brown sugar, 2 tsps cocoa and a tsp instant coffee. Pour on 1/3 cup of water.


Microwave on medium-high for 5 minutes, watching it to make sure it doesn't overflow. And voila! Delicious mocha pudding. Best eaten with ice cream, when one should be studying for upcoming mid-semester tests

Individual Mocha Pudding
Makes 1
25 g butter, melted
1/4 self-raising flour
1 tbsp cocoa powder
2 tbsps sugar
1 1/2 tbsps milk
dash vanilla essence

For the mocha sauce
2 tbsps brown sugar
2 tsps cocoa powder
1 tsp instant coffee granules
1/3 cup boiling water


  1. Mix the butter, flour, cocoa powder, sugar, milk and vanilla in a microwave safe bowl/mug vigorously with a fork, till well combined
  2. Sprinkle brown sugar, extra cocoa and coffee granules over the top. Pour on the boiling water, and microwave on medium high for 5 minutes.
  3. Allow to cool and serve with cream or ice cream.

Sunday, 27 March 2011

Une Miette


The other day I was heading to a pub for a friend's birthday, down on hardware lane. I noticed an interesting looking café, La Belle Miette, however it was closed. So of course, I had to go back when I went shopping with my sister on Saturday.


The store sold a variety of yummy sounding macarons. From left to right: cherry blossom, blueberry & violet, olive oil, strawberries & cream and salted caramel (my personal favourite). The store also sold coffees and French lemonade.

Monday, 21 March 2011

Gugelhopf!


Unusual name, delicious cake. According to wiki, the name, which is German,  has something to do with the cake being round and raising. Gugelhopf is a yeasty cake with a hidden little suprise inside...


Chocolate hazelnut spread!

These are so good warmed up with a cuppa. And not all that tricky to make.


Here's what you'll need


Chuck your dry yeast in a bowl


Add some warm milk, 2 tsps of plain flour and 2 tsps of sugar then cover and allow to sit for 15 minutes. Cream your butter and sugar, and add your egg yolks and vanilla in a separate bowl while you wait


After 15 minutes the yeast mixture should be foamy and fluffy. Add the yeast and remaining flour in alternating batches to the butter/egg mixture.


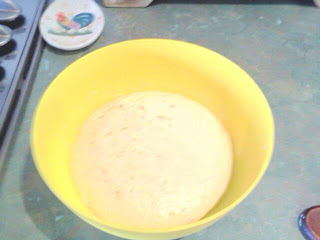
You should end up with a thick, slightly sticky dough. This will be going in your gugelhopf tin


Unfortunately I don't have a gugelhopf tin, so I decided to make mini gugelhopfs with this.


Put about a tablespoon of dough into each tin and make a well in the middle


Then fill up that well with your hazelnut spread


Then cover it up with a bit more dough. You don't want the tin to be filled right up, just about 2/3 of the way


Then cover em up and allow to stand for 30 minutes. I just use a tea towel.

P.S. have you noticed the theme of our kitchen's decor yet?


Bake for 20 minutes at 170 degrees celsius, till lightly browned. Allow to cool, then turn out and dust with icing sugar.

It's best that you don't tell people what's inside the cakes before they eat one. Give em a little suprise :)

Miniature Gugelhopfs
Makes 12
1 sachet (7g) active dry yeast
1/2 cup milk, warmed
1 1/2 cups plain flour
1/2 cup sugar
60g butter, softened
2 egg yolks
1/2 tsp vanilla bean paste
1/3 cup hazelnut spread

  1. Pour the yeast into a bowl. Add your warm milk and stir in 2 tsps sugar and 2 tsps flour. Allow to sit for 15 minutes. Note: milk should be warm to the touch, but not hot. We don't want to denature our little yeasts.
  2. Meanwhile, cream the butter and remaining sugar. Add egg yolks 1 at a time, beating after each one till mixture is light and fluffy. Beat in vanilla.
  3. Add the yeast mixture and remaining flour in alternating batches to the butter/egg mixture, mixing on low till ingredients have just combined.
  4. Grease and flour cake tin. Add 1 tbsp dough to each tin (or 1/3 dough if using a bundt or gugelhopf tin) and make a well in the middle of each. Fill well with 1 tsp hazelnut spread, then cover with another tbsp of dough. Cover and sit for 30 minutes.
  5. Preheat oven to 170 degrees celsius. Bake for 20 minutes, or till lightly browned. Allow to cool for 10 minutes, before removing from tin. Serve warm, dusted with icing sugar.


Monday, 14 March 2011

Pour mes amis


A few friends had there graduation this weekend. It was also my friend Bertrand's birthday, so I decided to make his favourite pastry to share - chocolate éclairs. I had never made choux pastry before, and it was suprisingly easier than I expected. I wasn't exactly happy with the custard cream recipe, so I won't post that till I find one I like.


Choux pastry
1 cup water
100g butter
1 cup plain flour
3 eggs


  1. Line 2 baking trays with baking paper and preheat oven to 200 degrees celsius (fan-forced).
  2. In a medium saucepan, heat butter and water over medium-low heat, till butter is melted and combined with water.
  3. Add in flour and stir vigourously, still ingredients come together to form a thick dough (this should happen fairly quickly if the heat is right)
  4. Remove from heat. If dough is hot, allow to cool for about 5 minutes, till warm to touch. Add in eggs one at a time, stirring rigourously after each addition.
  5. Transfer dough to a piping bag with a plain tip nozzle (I used 2 cm, but I only made fairly small éclairs). Pipe out short lines for small éclairs, or balls for profiteroles.
  6. Sprinkle a small amount of water onto baking paper, trying not to get drops on the actual pastry (the drops of water make the over more humid, meaning the pastry will puff up and become more airy). Place trays in oven for 10 minutes, then reduce heat to 160 degrees and bake for another 10 minutes, or till golden coloured.
  7. Remove from over & allow to cool. Cut in half and fill with cream or custard cream & top with chocolate glaze.

Saturday, 5 March 2011

Breakfast or dessert?


Today was one of those rare Sundays where I'm actually home in the morning (I usually work). So I decided to have a big cooked breakfast. You know, the kind where you stuff yourself so full you can't eat anything else all day, till dinner rolls around.  I settled on making pancakes. But not just any pancakes. Sticky date pancakes. Topped with home made butterscotch sauce, of course. And ice cream. And a handful of chopped pecans :)

Sticky date pancakes
Makes 8-10
1/2 cup seeded dried dates, chopped
1/2 cup boiling water
1/2 tsp bicarbonate of soda
125g butter, softened
2 tablespoons castor sugar
2 eggs
1 cup self raising flour, sifted
1/2 cup buttermilk

For the butterscotch sauce
1/2 cup brown sugar
200 ml cream
50g butter

1. Prepare the butterscotch sauce: combine all ingredients in a small saucepan & stir over low heat till combined. Leave on a low simmer whilst preparing the pancakes.
2. Combine dates, water and soda in a bowl. Allow to stand for 5 minutes
3. In a blender or food processor, blend date mixture with butter and sugar on high till pureed. Blend in eggs one at a time on high. Add flour and buttermilk, blend on low speed till just combined
4. Spray a fry pan with cooking spray and heat over medium heat (to test if fry pan is heated, you can flick on a drop of water. If it sizzles, the fry pan is ready). Pour in batter in 1/4 cup quantities. Cook till bubbles form on top, then flip & cook other side.
5. Serve pancakes with a scoop of vanilla ice cream and top with warm butterscotch sauce

P.S. extra butterscotch sauce makes a great topping for ice cream, or making really rich milk shakes.

Friday, 4 March 2011

Ultimate chocolate brownies


After a long hard first week back at uni, I felt I deserved something special. Something chocolatey. So, what better recipe to make than one of my (and my family's, and coworker's and pretty much everyone I know who's ever tried them) long time favourite recipes. My ultimate chocolate brownies.


The brownie parts pretty basic, more on the cakey side than fudgy compared to some brownies I've tried. But the secret to my brownies...


Is some good quality dark chocolate. I like the higher cocoa content lindt, but if I'm specifically cooking them for others, I tend to use a less strong chocolate.


Simply break into squares and scatter over the top of the mixture - no need to push them down, they sink  in on their own.


And if you're REALLY in the mood for some chocolate, you can scatter some choc chips on top to add even more flavour. 


You can't really tell from this picture, but the squares of chocolate sink in and form a delicious molten centre when you eat these warm. The perfect comfort food for when you've had a long week.

Ultimate chocolate brownies
Makes 12
250g salt reduced butter, melted
2 cups sugar
1 tbsp vanilla bean paste (or extract)
4 eggs
1 cup plain flour
2/3 cup cocoa powder
1tsp baking powder
pinch of sea salt
pinch of ground cardamom (optional)
150g block of dark chocolate

  1. Preheat oven to 180 degrees C. Line a brownie tin.
  2. Mix together the butter, vanilla and sugar in a large bowl, till combined - sugar should be partially dissolved in butter. 
  3. Add eggs and stir till just combined
  4. Sift together flour, cocoa powder, salt and cardamom (I find the cardamom helps really bring out the chocolate flavour, but its totally optional). Add to butter mixture and mix till ingredients are just combined, and there are no lumps.
  5. Pour mixture into tin. Break up block of chocolate and scatter pieces on top.
  6. Bake for 40 minutes. Leave in tin to cool for 15 minutes, then remove and cut into 12 slices. Best served warm with ice cream or cream.
You can make these with a variety of chocolate, though the dark does tend to melt the best if you reheat them in a microwave. I've found the rolo chocolates are a popular addition.


Tuesday, 1 March 2011

Short & Sweet

Just a quick post to inform everyone that I've entered two recipes into the bpay short & sweet competition, and would love your vote. I've entered my fudge recipe (which is famous amongst my high school friends) and my brown sugar cinnamon toast. Here are the links:

Famous fudge

Brown sugar cinnamon toast

I'll try to get some photos up soon :)

Saturday, 26 February 2011

Naughty & nice


Back to uni on Monday! I decided to bake something that would keep for most of the week so I would have a treat to add to my lunches. Of course, since I was already baking, I had to make enough to share with my family. And whilst I wanted to make something sweet yet slightly healthy, I knew not everyone in the house would appreciate my tastes. 

Cookies were my baked good of choice. I simply made up my basic cookie dough, then divided the mixture in half


One half with plain old choc chips.


And one with sultanas, dates and oats


The choc chip ones came out absolutely perfect


I made the fruit and oat ones a little on the small side. Oh well, I suppose they're just portion controlled

The recipe for the cookie dough is seriously delicious, the perfect combination of chewiness and crispiness, and you get heaps of cookies from it. I'm sure the dough would freeze well if you're not comfortable making such a large quantity all at once. I wouldn't worry though, they won't last long.

Café style cookies
Makes 64 cookies

Basic cookie dough
250 g butter softened
1/2 cup caster sugar
190 ml condensed milk (approximately half a normal can)
2 1/4 cups self raising flour
pinch of baking powder

Add-ins
250g dark chocolate chips
3/4 cup oats
1/3 cup chopped pitted dates
1/4 cup raisins
shredded coconut, optional

  1. Beat the butter and sugar together till light & creamy. Beat in condensed milk, on high speed for 2 minutes.
  2. In a separate bowl, sift together flour and baking powder. Add flour into butter mixture in 3 parts, beating on low speed till just combined
  3. Divide the mixture in half. In one half, mix in the chocolate chips, in the other half, add oats, dates and raisins. Mix till add-ins are evenly distributed through the dough
  4. Refrigerate dough for half an hour. 
  5. Preheat oven to 180 degrees C. Line two baking trays. Roll cookie dough into 2 cm diameter balls, spacing roughly 2 cm apart. Sprinkle shredded coconut on top of fruit & oat cookie dough. Bake for 10-12 minutes, or till just slightly brown on the edges.
  6. Cool for 5 minutes on tray, then transfer to wire rack to cool completely.
This recipe is a modification of this original recipe: http://www.bestrecipes.com.au/recipe/Cafe-Choc-Chip-Cookies-L2067.html

You could probably add just about anything you like to the basic dough recipe. Next time I think I'll try white chocolate, craisins and macadamias.